Recipes, re-invented from cooking shows
Chocolate Peanut Lava Cake

Prep. Time:
Baking Time:
Total Time:
20 minutes (active)
8-12 minutes
About 35 minutes
Serves:
6 individual puddings
Rebecca Cary's faithful reproduction of Paul Hollywood's Molten Puddings — individual chocolate lava cakes hiding a hot peanut butter centre — set as the Technical Challenge in Cake Week of Great American Baking Show ™ Season 4. The recipe is Paul Hollywood's published GBBO Molten Puddings, used her...
Read more
Often, our recipes are complicated, to achieve "television ready" dishes. If you would like a version you can easily make at home, please just ask. Leave your email and we'll notify you when it's ready!
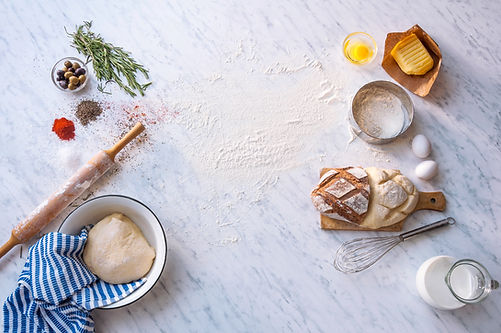
Ingredients
FOR THE MOULDS:
1 tbsp (15g) unsalted butter, softened (for greasing)
2 tbsp (15g) cocoa powder, unsweetened (for dusting)
FOR THE CHOCOLATE BATTER:
5.8 oz (165g) dark chocolate (70% cocoa solids), chopped roughly
6 tbsp (85g) unsalted butter, cut into cubes
3 whole large eggs, room temperature
3 large egg yolks, room temperature
1/3 cup + 1 tbsp (85g) caster (superfine) sugar
2 tbsp (16g) plain (all-purpose) flour, sifted
FOR THE PEANUT BUTTER CENTRES:
6 heaped tsp (about 60g) smooth peanut butter (conventional, not natural)
TO SERVE (OPTIONAL):
Cocoa powder or icing sugar, for dusting
Vanilla ice cream or pouring cream


Instructions
STEP 1: PREPARE THE MOULDS
Use a pastry brush to coat the inside of six 4-oz (120 ml) pudding moulds, dariole moulds, or stout ramekins with the softened butter. Get into every angle, especially the seam where the base meets the sides. Sit the buttered moulds in the fridge for 5 minutes to firm the butter, then dust the inside of each with cocoa powder, tapping out the excess. Place the prepared moulds on a heavy baking sheet.
STEP 2: PREHEAT AND SET UP
Heat the oven to 400°F / 200°C / 180°C fan. Position a rack in the centre of the oven. Measure the peanut butter into six heaped teaspoonfuls onto a small plate so you can move quickly once the batter is ready.
STEP 3: MELT THE CHOCOLATE AND BUTTER
Set the chopped dark chocolate and cubed butter in a heatproof bowl over a saucepan of barely simmering water — do not let the bowl touch the water. Stir occasionally until smooth and glossy, then remove from the heat and let it cool until just warm to the touch — not hot. (Microwave alternative: 30-second bursts at 50% power, stirring between each.)
STEP 4: WHISK THE EGGS TO THE RIBBON STAGE
In a large bowl, whisk the whole eggs, egg yolks, and caster sugar on high speed for 4–6 minutes until the mixture is thick, pale, and mousse-like. When you lift the whisk, the batter should fall back in a ribbon that holds its shape briefly on the surface before sinking. This aerated egg base is the only lift the cake gets — there is no baking powder. Skimp on the whisking and the cakes will be dense and flat.
STEP 5: FOLD IN THE CHOCOLATE
Pour the cooled chocolate-and-butter mixture down the side of the egg bowl and fold it through with a large metal spoon or silicone spatula, using broad, gentle scoops from the bottom up. Stop the moment the batter is uniform in colour — over-folding here is the most common reason for a flat cake.
STEP 6: FOLD IN THE FLOUR
Sift the flour over the top of the batter and fold it in with the same broad, gentle motion until just incorporated. The flour quantity is deliberately tiny — it gives the cake just enough structure to support the molten centre without making the surround cakey.
STEP 7: FILL THE MOULDS IN TWO STAGES
Divide about two-thirds of the batter equally between the six prepared moulds — they should be filled roughly halfway. Drop a heaped teaspoonful of peanut butter into the centre of each mould, settling it gently on the batter; do not press it to the base. Spoon the remaining batter over the top of each, covering the peanut butter completely. The moulds should now be filled to about three-quarters.
STEP 8: BAKE
Slide the baking sheet into the centre of the oven and bake for 8–10 minutes. The tops should be risen and just set, with a slight wobble when the tray is nudged, but no crack across the surface. A cracked top means the centre has set. For 4-oz moulds, 9–10 minutes is the sweet spot in most home ovens; use the first cake as a calibration test if you can. Pull the tray the moment the surface loses its wet sheen but before any crack appears.
STEP 9: TURN OUT AND SERVE IMMEDIATELY
Let the cakes rest in the moulds for no more than 30–60 seconds — any longer and the residual heat finishes cooking the centre. Run a small offset spatula or palette knife gently around the inside edge of each mould. Place a serving plate over the top of each mould and, holding both firmly with a tea towel, invert. Lift the mould straight up. Dust with cocoa or icing sugar if liked, and serve straight away alongside a scoop of vanilla ice cream or a pour of cold cream. The dramatic centre flow happens at the first cut.


Heading 5
Heading 5
Heading 5
Would you like to see any how-to videos for this recipe? Just ask — leave your email and we'll notify you when videos are added.


Comments, or questions, for this recipe
Add a new comment